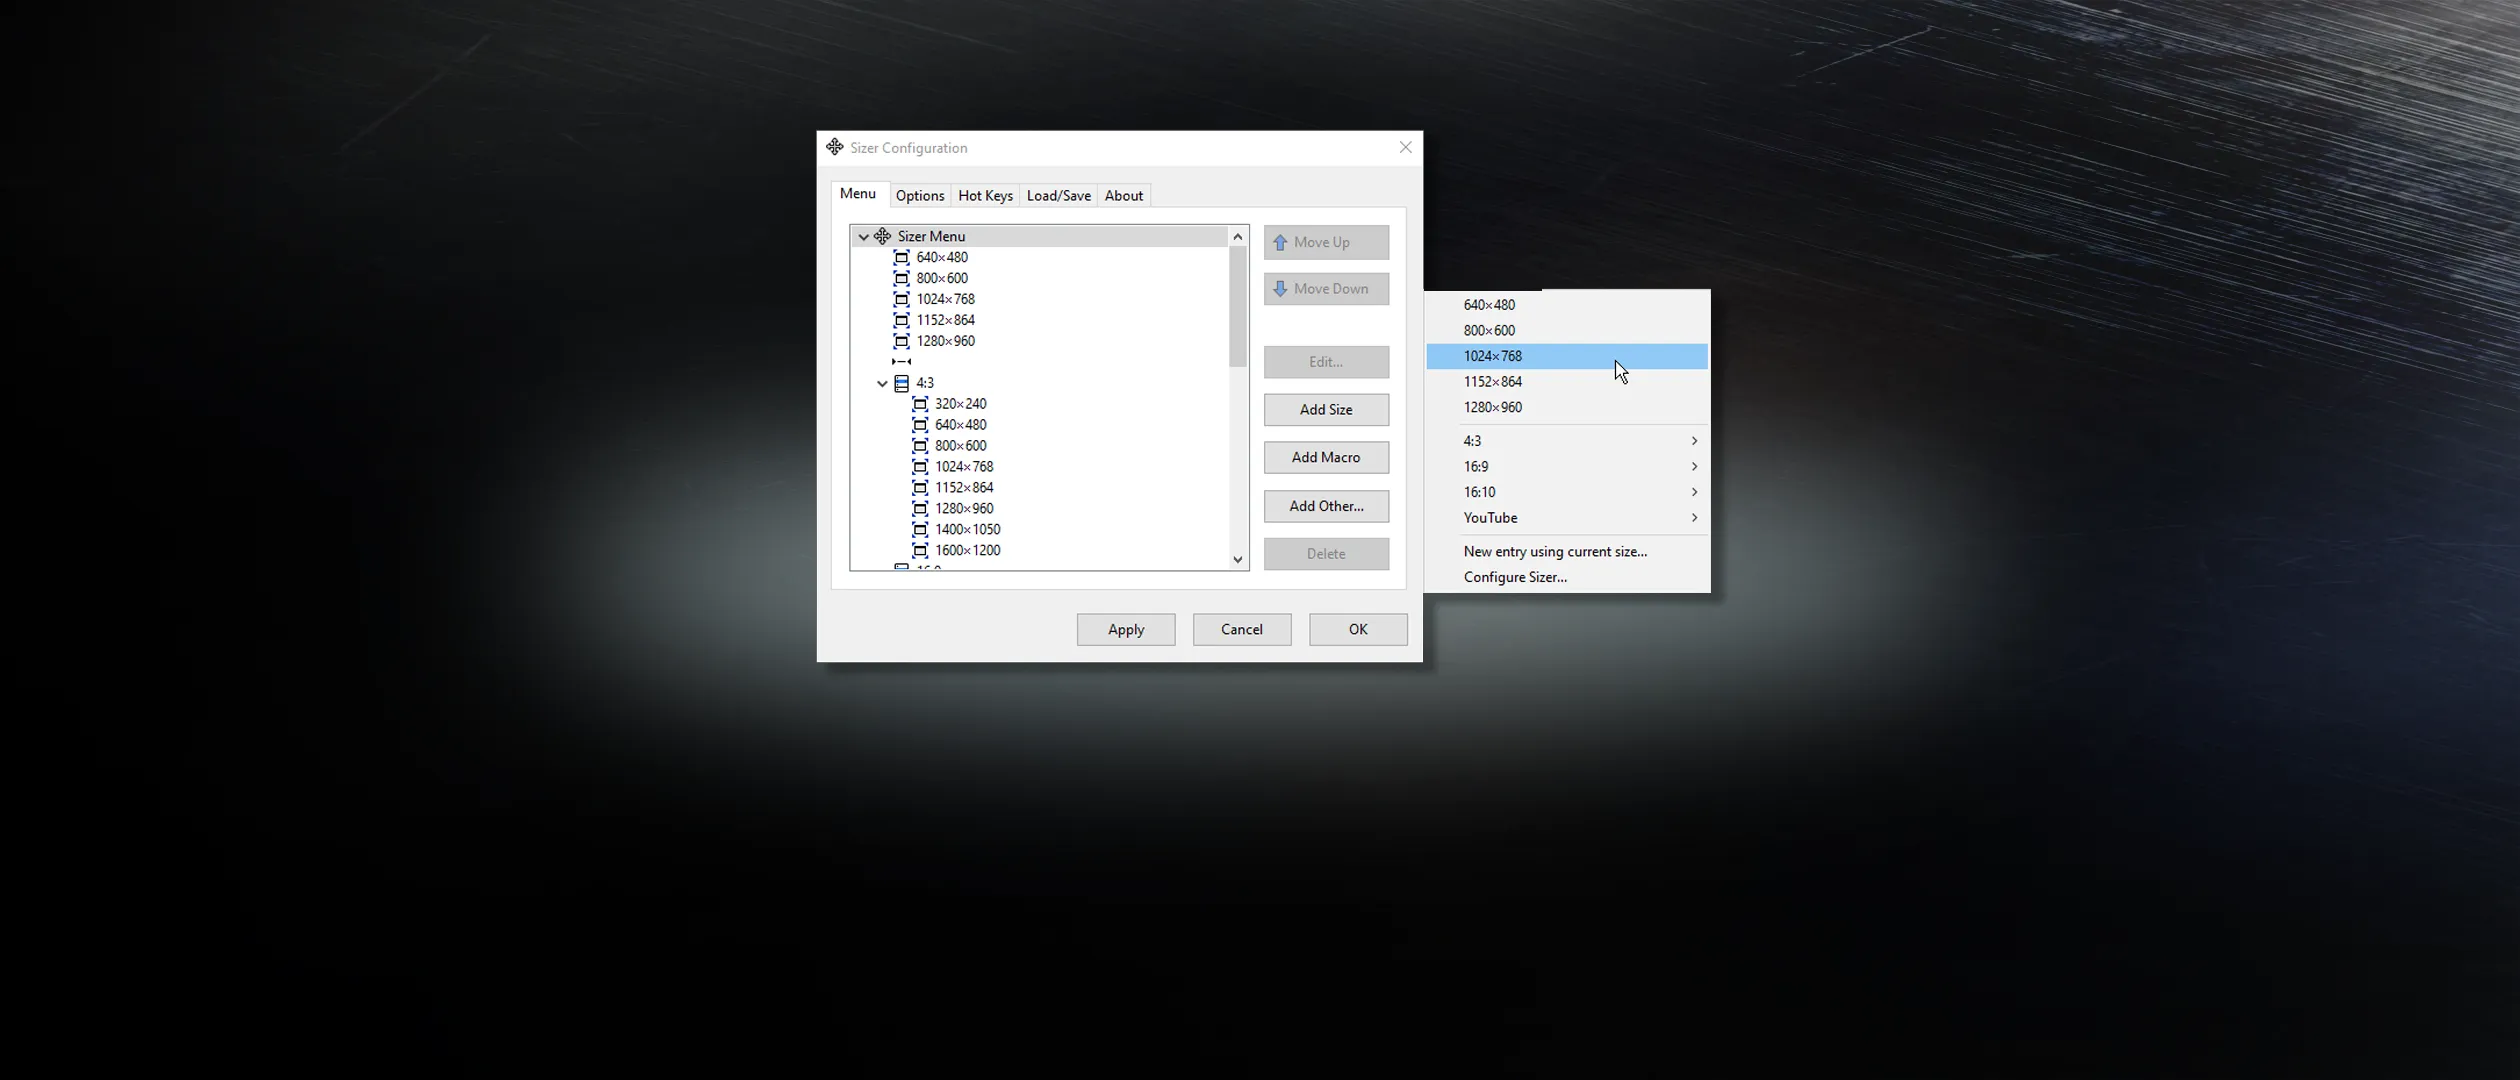
Ever tried to retake a screenshot months later, only to realize you cannot match the original window size?
I often find myself wanting to update a screenshot for documentation or a blog post, but I want a consistent visual across all my content. Matching the exact window size from a previous screenshot is surprisingly difficult with just the mouse. Over time, I have developed a simple approach to recreate window snips in the same aspect ratio and size every time - and it relies on a small but mighty tool called Sizer.
Sizer is a freeware utility that allows you to resize any window to an exact, predefined dimension. It is lightweight, runs in the background, and adds a new option to the right-click menu of any window’s title bar. Despite being last updated on 16 April 2020, it still works remarkably well on Windows 10 and Windows 11, and it remains one of the tools I have easily within reach. I also mention Sizer in my favorite tools post.
Why consistent window sizes matter
Consistent window sizes matter more than you might think, especially if you write documentation, create tutorials, or maintain a blog. Screenshots that vary in size and proportion look unprofessional and make it harder for readers to follow along. By resizing windows to the same dimensions before capturing, you get a clean, uniform look across your content.
This is especially useful when you need to retake a screenshot months later - maybe a dialog has changed, or you want to reflect an updated interface. Without a reliable way to match the original window size, you end up guessing and adjusting manually.
Download and install Sizer
Sizer 4.0 is available as a free download from the developer’s website. You can download it from brianapps.net/sizer4 .
Alternatively, you can install Sizer using Windows Package Manager. Note that Sizer is available under multiple package IDs in winget - I recommend using BrianApps.Sizer.Dev, which is the 4.0 version. You can install it with the following command:
winget install --id "BrianApps.Sizer.Dev" --exact --silent --source winget
Install Sizer 4.0 using winget
Once installed, Sizer runs quietly in the system tray. You will notice a small icon there - right-click it to access the configuration menu.
How to resize a window with Sizer
How to resize a window with Sizer is straightforward once the tool is running. There are several ways to trigger a resize:
- Right-click the title bar of any window - you will see a Sizer submenu with your predefined sizes.
- Right-click the Sizer icon in the system tray and select a size from the list.
- Default keyboard shortcut - Press Ctrl + Shift + Z while a window is focused to open the Sizer menu directly on that window. This is the built-in default shortcut and works out of the box without any configuration.
- Custom keyboard shortcuts - Assign dedicated hotkeys to specific sizes so you can resize the active window in a single key press (more on that below).
Select the desired dimension from the list, and the window will instantly resize to that exact size. For my daily workflow, I rely mostly on the Ctrl + Shift + Z shortcut and custom hotkeys - it is faster than reaching for the mouse, especially when capturing multiple screenshots in sequence.
Built-in preset sizes

Sizer comes with several preset sizes out of the box, covering common screen resolutions. Here are some of the included defaults:
| Preset | Width | Height | Use case |
|---|---|---|---|
| 640 x 480 | 640 | 480 | Legacy VGA resolution |
| 800 x 600 | 800 | 600 | Small form factor screenshots |
| 1024 x 768 | 1024 | 768 | Standard 4:3 documentation |
| 1280 x 1024 | 1280 | 1024 | 5:4 desktop resolution |
| 1360 x 768 | 1360 | 768 | Common laptop display |
| 1920 x 1080 | 1920 | 1080 | Full HD screenshots |
Sizer includes additional presets beyond these - open the configuration window to see the full list. These presets are useful as a starting point, but the real power of Sizer comes from creating your own custom sizes.
Create your own custom sizes
Creating your own configuration is where Sizer becomes truly valuable. Here is my general approach for setting up custom sizes for documentation and blog post screenshots:
Determine your target dimensions - Before adding a custom size, decide on a standard dimension for your screenshots. I recommend picking one or two sizes and sticking with them for consistency. For example, I use a specific width that matches the content area of my blog, so screenshots fit perfectly without scaling.
Open Sizer configuration - Right-click the Sizer icon in the system tray and select Configure Sizer…. This opens the configuration window where you can add, edit, and remove size entries.
Add a new size entry - Click the Add button and configure the following:
- Description - Give the entry a descriptive name (e.g., “Blog screenshot” or “Documentation - wide”)
- Width - Set the exact width in pixels
- Height - Set the exact height in pixels
You can also configure the window position if you want the resized window to snap to a specific location on your screen.
Assign a keyboard shortcut (optional) - For sizes you use frequently, assigning a keyboard shortcut saves time. In the size entry configuration, you will find a Shortcut Key field where you can set a hotkey combination. To assign a shortcut, click in the Shortcut Key field and press your desired key combination. Sizer supports modifier keys like Ctrl, Alt, and Shift combined with any standard key. For example:
- Ctrl + Alt + 1 for your blog screenshot size
- Ctrl + Alt + 2 for your documentation size
- Ctrl + Alt + 3 for a wide-format capture
Using numbered shortcuts like this makes it easy to remember which hotkey maps to which size. These shortcuts are global, meaning they work regardless of which application has focus - just make sure the window you want to resize is the active window. I find custom hotkeys especially useful when I am capturing multiple screenshots in a row - resize, capture, next window, resize, capture.
Save and use - Click OK to save your configuration. Your new custom size will now appear in the right-click menu and can be triggered via the keyboard shortcut if you configured one.
Tips and tricks
Here are a few tips I have picked up from using Sizer over the years:
- Standardize early - Pick your screenshot dimensions before you start a documentation project, not halfway through. Changing sizes later means retaking earlier screenshots.
- Name entries descriptively - Use names like “Blog - 1080w” or “Docs - narrow” instead of just the pixel dimensions. It makes the menu easier to navigate when you have several entries.
- Combine with Snipping Tool - After resizing a window with Sizer, use the Windows Snipping Tool (Win + Shift + S) to capture the window. This combination gives you pixel-perfect, consistent screenshots every time.
- Multiple monitors - Sizer works across multiple monitors. You can even configure position settings to move windows to a specific monitor when resizing.
If you create documentation or blog content regularly, give Sizer a try - it is one of those small tools that saves more time than you would expect.
–Jesper