Have you ever wished you could instantly act on anything you see on your screen without switching between applications or manually copying content?
I have been fortunate enough to be using a Copilot+ PC on ARM64 for some time now - it is the Surface Laptop 7, and it is awesome in so many ways. But one thing sets it apart - the access to the AI features in Windows 11. There are many new capabilities and they are often overlooked. One of these capabilities is Click to Do, which I have started using all the time. So, if you, like me, have a Copilot+ PC, I highly encourage you to enable Click to Do.
But how do you enable this? And more importantly, how can you use it to boost your productivity? What follows is everything you need to know about Click to Do - from verifying your device is ready, to enabling the feature, and practical examples that will make you wonder how you lived without it.
What is Click to Do?
Click to Do is an AI-powered feature exclusive to Copilot+ PCs running Windows 11 version 24H2 or later. It allows you to take instant actions on any content visible on your screen - whether it is text, images, files, or other elements. Think of it as having an intelligent assistant that can analyze what you see and suggest relevant actions.
Image viewer

When you activate Click to Do, it captures and analyzes your screen using on-device AI processing. The feature then identifies actionable elements and offers contextual options like:
- Extracting and copying text from images
- Searching the web for selected content
- Opening images in editing applications
- Blurring backgrounds or removing objects from images
- Creating bulleted lists from selected files
- Summarizing or rewriting text
- Looking up definitions or translating content
The beauty of Click to Do is that all processing happens locally on your device using the Neural Processing Unit (NPU) - your data never leaves your PC.
Someone might argue that Click to Do is just taking a screenshot and applying AI to it - and that you could achieve the same with Snipping Tool or similar. They would not be entirely wrong. However, Click to Do removes several clicks from your workflow and integrates the AI analysis seamlessly. More importantly, some of the examples I share below cannot be achieved using Snipping Tool alone - the contextual intelligence and instant actions are what set Click to Do apart.
Before you can use Click to Do, you need to confirm you have a Copilot+ PC with the required AI components.
Verifying Copilot+ PC hardware and AI components
Click to readVerifying your Copilot+ PC status
A Copilot+ PC requires specific hardware, including:
- A Neural Processing Unit (NPU) capable of 40+ TOPS (Trillions of Operations Per Second)
- At least 16 GB of RAM
- 256 GB or more storage
- Windows 11 version 24H2 or later
To check your device specifications:
- Open Settings and navigate to System > About
- Look for your processor - Copilot+ PCs typically feature Qualcomm Snapdragon X Elite/Plus, Intel Core Ultra (Series 2), or AMD Ryzen AI 300 series processors
- Verify you have at least 16 GB of RAM
You can also open Task Manager (Ctrl + Shift + Esc) and navigate to the Performance tab to look for NPU in the left sidebar. However, seeing an NPU listed does not guarantee Copilot+ PC status - the NPU must be capable of 40+ TOPS, which Task Manager does not display.
Note
You do not necessarily need physical Copilot+ hardware. Windows 365 Cloud PCs also support Copilot+ capabilities, bringing AI-powered features like Click to Do to virtual desktops. This means organizations can deliver the Copilot+ experience to users without upgrading their physical devices. For more information, see Experience next-gen productivity with Windows 365 AI-enabled Cloud PCs on Microsoft Learn.Verify Windows AI components
Click to Do relies on Windows AI components that should be installed automatically on Copilot+ PCs. To verify these components are present:
- Open Settings and navigate to System > AI Components
- Verify that the required AI components are installed and up to date
Alternatively, open Settings and search for “AI Components” to go directly to the page.
You should see these components:
- AI Image Extraction
- AI Image Search
- AI Phi Silica
- AI Semantic Analysis
- AI Settings
If any components are missing or show as unavailable, check for Windows updates to ensure all AI features are properly installed. For detailed version information and release history, see Release information for AI components on Microsoft Learn.
Enabling Click to Do
Click to Do should be enabled by default on Copilot+ PCs, but if you need to enable it manually or want to verify the settings, follow these steps:
- Open Settings (Windows key + I)
- Navigate to Privacy & security > Click to Do
- Toggle the Click to Do switch to On

Click to Do in Privacy & Security settings.

Enable Click to Do in Privacy & Security > Click to Do settings.
Tip
If you do not see the Click to Do option in Settings, ensure your device has the latest Windows updates installed. The feature requires Windows 11 version 24H2 with specific cumulative updates.Enabling Click to Do using Microsoft Intune
Click to readFor organizations managing Copilot+ PCs with Microsoft Intune, you can configure Click to Do using configuration policies. This is particularly useful for enabling or restricting the feature across your managed device fleet.
Using the Settings Catalog
- Sign in to the Microsoft Intune admin center
- Navigate to Devices > Windows > Configuration > Create > New policy
- Select Windows 10 and later as the platform
- Select Settings catalog as the profile type
- Click Create
- Provide a name (e.g., “Click to Do Configuration”) and description
- Click Add settings and search for “Click to Do”
- Select the Click to Do category and configure the following settings:
- Disable Click to Do - Set to Click to Do is Enabled to allow the feature
- Click Next and assign the policy to your target groups
- Review and create the policy
Using CSP directly
The Click to Do settings are available via the Policy CSP. You can use the following OMA-URI settings:
| Setting | OMA-URI | Values |
|---|---|---|
| Enable Click to Do | ./Device/Vendor/MSFT/Policy/Config/WindowsAI/DisableClickToDo | 0 = Enabled (default), 1 = Disabled |
Important
Click to Do only functions on Copilot+ PCs with the required hardware. Deploying these policies to non-Copilot+ PCs will have no visible effect, though the settings will be applied.Using Click to Do
Once enabled, you can activate Click to Do using these methods:
| Method | How to use |
|---|---|
| Quick click | Hold Windows key and left-click on any element |
| Capture mode | Press Windows key + Q to select an area |
| Start menu | Search for “Click to Do” and click the result |
| Snipping Tool | Capture with Snipping Tool, then click the Click to Do button |
The quickest method is Windows key + left-click directly on the content you want to act on.
Understanding the Click to Do toolbar
The Click to Do toolbar is your control center for selecting and acting on screen content. It offers three selection modes, each suited to different scenarios - from quick single-element actions to precise multi-item captures.
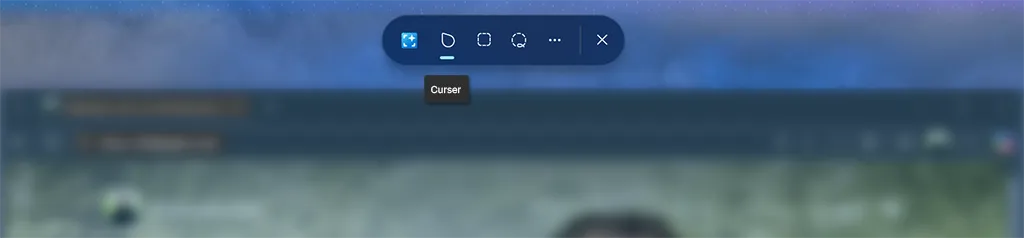
Click to Do: Cursor
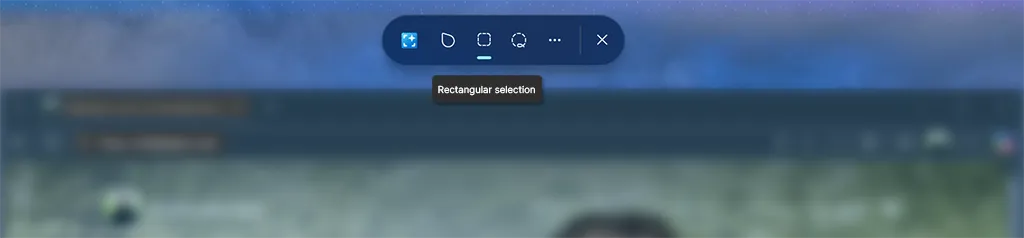
Click to Do: Rectangular selection
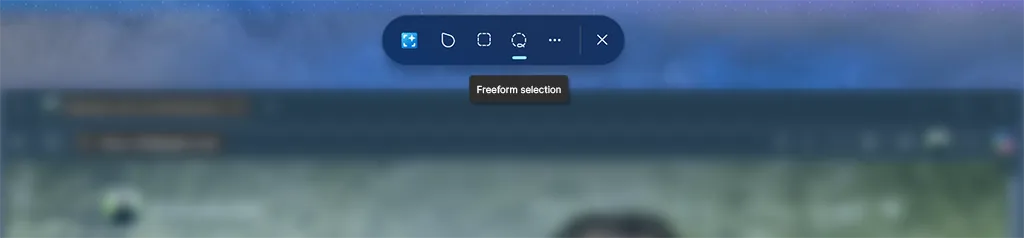
Click to Do: Freeform selection
When you activate Click to Do, a toolbar appears at the top of your screen with three selection modes:
| Mode | Description | Best for |
|---|---|---|
| Cursor | Default mode - Click to Do automatically identifies and highlights actionable elements as you hover. Click any highlighted element to see available actions. | Quick actions on single elements like text blocks, images, or buttons |
| Rectangular | Click the rectangle icon, then draw a box around any area. Click to Do analyzes everything within the selection. | Capturing multiple elements, selecting content across windows, or extracting text from image regions |
| Freeform | Click the freeform icon, then draw any shape around content you want to act on. | Excluding unwanted elements, selecting irregularly shaped content, or precise selection in cluttered screens |
The toolbar intelligently recognizes content types. Text elements show copy, search, or summarize options, while images show editing, extraction, or search options.
Practical examples
Here are some practical examples of how Click to Do can simplify your day to day workflow.
Copying non-copyable UI text
When writing documentation, blog posts, or guidelines you frequently need exact text from UI elements that do not support Ctrl+C - message boxes, legacy dialogs, tooltips, menu items, or ribbon labels. Click to Do removes the typing and transcription errors:
- Make the UI element visible (open the dialog, reveal the tooltip, or display the menu)
- Press Windows key + left-click on the text element. For multi-line or multiple elements, use Windows key + Q and draw a rectangle around the region
- Choose Copy text to grab the selection, or Create bulleted list if extracting multiple lines or items
- Paste into your editor, wrap in a blockquote or code block as required for documentation, and correct any minor OCR issues
Tips:
- Use capture mode for dialogs with several fields to extract all labels at once
- Paste into a plain-text editor (Notepad) first if you need to strip formatting before moving to Markdown or CMS
- For screenshots with small or low-contrast text, zoom or increase display scale before capturing to improve OCR accuracy
- When documenting commands or registry paths, paste into a code block to preserve whitespace and formatting
This is particularly useful for copying error dialog text, menu labels, and other UI strings when compiling step-by-step guides or reproducing exact interface wording.
Creating a file list from Windows Explorer
When documenting folder structures for blog posts, presentations, or emails:
- Open Windows Explorer and navigate to the folder you want to document
- Select the files and folders you want to include (or leave them visible in the view)
- Press Windows key + Q to activate Click to Do in capture mode
- Draw a rectangle around the file and folder names
- Click to Do offers a Create bulleted list option
- Select it to generate a formatted list you can paste anywhere
This turns what would be tedious manual typing into a two-second task.
Extracting error codes and actionable text from screenshots
When troubleshooting devices, support tickets often arrive as screenshots containing error codes, command lines, or log snippets that are hard to retype. Click to Do can extract those exact values so you can act immediately:
- Open the screenshot or display the error/log on screen
- Press Windows key + left-click on the region containing the text
- Click to Do uses OCR to extract the text; choose Copy text to grab a single value or Create bulleted list when extracting multiple lines
- Paste the result into a search, your ticket, or a terminal (for example, to run a suggested command), or choose Search the web to look up the error code or KB article
This saves time when dealing with long GUIDs, registry paths, stack traces, or multi-line log fragments sent via chat or email, and reduces transcription errors compared with manual retyping.
Quick web searches for technical terms
When reading documentation or reviewing configurations:
- Press Windows key + left-click on any technical term, registry key, or setting name
- Select Search the web from the available actions
- A search results panel opens with relevant information
This eliminates the context switching between reading content and researching unfamiliar terms.
Summarizing text content
When reviewing lengthy documents or web pages:
- Use Windows key + Q to activate Click to Do
- Draw a rectangle around a block of text you want to understand quickly
- Select Summarize from the available actions
- Click to Do generates a concise summary of the selected content
This is particularly valuable when skimming through lengthy technical documentation or reports.
Other AI features in Windows 11 on Copilot+ PCs
Beyond Click to Do, Copilot+ PCs include several on-device AI capabilities that address productivity, creativity, and communication. Below is a compact, scannable overview with practical notes for each feature.
Recall - searchable timeline of what you saw: Periodic, encrypted local screenshots and on-device indexing let you find previously seen content. Strong privacy controls exist. Great for retrieving information you forgot to bookmark or capture.
Cocreator - image generation and transformation: Integrated into Paint and select apps; combine sketches and prompts to produce new visuals or restyle existing images for documentation or marketing assets.
Windows Studio Effects - better video and audio: AI-powered camera and microphone enhancements (background blur/replacement, automatic framing, eye-contact correction, voice focus) for higher-quality meetings without extra hardware.
Live Captions with translation - real-time, local translation: Captions for any audio with on-device translation between many languages - useful for meetings with distributed teams.
Image Creator & Restyle Image - quick image variants: Generate images from text or restyle photos with different artistic looks; handy for header images, thumbnails, and concept art.
For more details on these features, see Copilot+ PCs on the Microsoft website.
Final thoughts
Click to Do represents a new paradigm in how we interact with content on our screens. Instead of the traditional workflow of selecting, copying, switching applications, and pasting, you can now take instant actions directly from any visual content.
For IT professionals, the ability to quickly extract error messages, document file structures, and capture information from anywhere on screen removes friction from documentation and troubleshooting workflows. For knowledge workers generally, it simplifies the constant flow of information that defines modern work.
The key to getting value from Click to Do is building the muscle memory to reach for Windows key + left-click whenever you see something you want to act on. After a few days of intentional use, it becomes second nature - and you will find yourself frustrated when using devices that do not have it.
If you have a Copilot+ PC, I encourage you to explore Click to Do today. And if you are considering your next PC purchase, the AI capabilities of Copilot+ PCs - including Click to Do, Recall, and the other features I mentioned - are compelling reasons to make the leap.
–Jesper
Header image attribution: Image created with help from Adobe Firefly `