
What happens when ambitions are higher than your current skill set, but you keep building anyway?
This is not a guide, it is merely a continuation of my blog-ramblings, a collection of things I found useful while building this website from the ground up. If you have been following this Building my blog series, you know the pattern by now: I start with something I want to build and run headfirst into the limits of what I know - struggle - learn - and come out the other side with something I am genuinely proud of.
It has been over a year since part 3.5, and so much has changed that calling this “part 4” almost undersells it - “part 4.5” might be more honest given the sheer amount of ground covered.
This chapter covers more ground than any previous entry in the series. Theme development has evolved from copying examples I barely understood to building with genuine confidence. New pages have been added to the site. The content workflow has matured. And perhaps the biggest shift - GitHub Copilot, instruction files, and Microsoft Copilot Cowork have become central to how I work and what I write about. Posts are flowing more frequently now, and the backlog that once felt overwhelming is finally getting smaller. The gap between ambition and competence is not a problem to solve; it is the engine that drives learning. And lately, that engine has been running at full speed.
The path from “I do not know how” to “I built that” is never straight. It winds through documentation, trial and error, broken builds, and late nights. But when you finally see the result working, that feeling is worth every frustrating hour.
Looking back at my earlier posts, I can clearly see rough edges. I keep them that way on purpose. They represent where I was at that point in time. What I do update is structure, clarity, and consistency so the archive stays authentic while still useful for readers.
Theme development evolution
The pattern I described in part 3.5 has not changed: every new post seems to inspire extending a shortcode or building something new. The difference now is confidence. When I first started building custom shortcodes, I had no Go templating experience. I would stare at Hugo documentation for hours and copy examples I barely understood - break things - fix them - break them again. There were evenings where a single {{ with }} block took me an hour to get right.
But that struggle was the point. I wanted to understand every line of my templates, not copy someone else’s theme and hope it worked. The investment has paid off - now when I need a new component, I can usually build it in an afternoon instead of a week.
Why custom over built-in?
As that confidence grew, extending Hugo’s built-in shortcodes and render hooks with custom versions felt like a natural next step. Hugo provides a set of built-in shortcodes and default rendering behavior, so why go through the trouble? There are several reasons:
- Consistency: Every image, table, code block, and alert follows the same design language - my design language
- Bootstrap integration: Built-in Hugo shortcodes do not output Bootstrap-compatible markup; my implementations generate proper Bootstrap classes and components
- Font Awesome icons: My shortcodes include Font Awesome icons where appropriate - in alerts, external link indicators, and more
- Error handling: My render hooks validate that images exist, links are properly formatted, and required parameters are provided - throwing build errors when something is misconfigured rather than silently failing
- Enhanced features: Automatic captions for tables, lazy loading for images, proper accessibility attributes, and responsive behavior
Extending these into something tailored to my needs has been a tremendous learning experience, and the investment pays off every time I write a new post.
Shortcodes
Shortcodes are reusable snippets that extend Markdown’s capabilities. Instead of writing raw HTML or repeating complex markup, I simply use a shortcode like {{< alert type="note" >}} or {{< img src="image.webp" >}} and Hugo handles the rest.
| Shortcode | Description |
|---|---|
abbr | Abbreviation with tooltip |
about | About section component |
ai-note | AI content disclaimer |
alert | Alert/callout boxes (note, warning, important, etc.) |
alert-ai | AI-specific alert variant |
audio | Embedded audio player |
bmc | Buy Me a Coffee widget |
bsky | Bluesky embed |
card | Card component |
carousel | Shows images in a carousel |
column | Column layout helper |
credly | Credly badge embed |
datetime | Date/time formatting |
dtls | Details/disclosure element |
fa | Font Awesome icon helper |
gallery | Image and video gallery |
github | GitHub repository and Gist embed |
hide | Hides content from a post |
hr | Horizontal rule/divider |
img | Enhanced image handling |
lastmod | Last modified date display |
linkcard | Link card preview |
mark | Text highlighting |
pdf | PDF embed viewer |
posts | Posts listing |
projects | Projects listing |
qr | QR code generator |
raw | Raw HTML passthrough |
resources | Resources/links section |
row | Row layout helper |
series | Series navigation |
sessionize | Sessionize speaker profile and sessions embed |
social | Social media links |
timeline | Timeline component |
upcoming | Shows future posts scheduled for publication |
video | Video embed |
x | X (Twitter) embed |
youtube | YouTube video embed |
Looking at this table now, it is hard to believe I built all of these. Each one represents hours of learning - reading Hugo documentation, studying other people’s implementations, making mistakes, and slowly understanding why things work the way they do. The sessionize shortcode alone took me three attempts before I figured out how to fetch external API data safely. The gallery shortcode went through five rewrites as I learned more about responsive images and lazy loading.
Render hooks
Render hooks intercept standard Markdown elements and transform them during the build process. When I write a regular Markdown image, link, or table, Hugo passes it through my custom render hook before generating the final HTML.
| Render Hook | Description |
|---|---|
render-blockquote | Custom blockquote rendering |
render-codeblock | Enhanced code block styling with captions and other features |
render-codeblock-prompt | Provider-aware AI prompt styling |
render-heading | Custom heading rendering with anchors |
render-image | Enhanced image rendering with placeholder for ‘missing file’ |
render-link | Custom link handling |
render-table | Enhanced table rendering with captions and other features |
When to use shortcodes vs. render hooks
You might notice I have both an img shortcode and a render-image render hook. The render hook works great for simple images where standard Markdown syntax suffices: . It automatically applies Bootstrap classes, lazy loading, and validates that the image exists.
The img shortcode gives me full control when I need it:
- Custom CSS classes for special layouts
- Explicit width and height for precise control
- Figure and figcaption wrappers for semantic HTML
- Link wrapping to make images clickable
- Alignment options with proper Bootstrap grid classes
For simple inline images, the render hook handles it beautifully. For screenshots with captions or images that need specific styling, the shortcode is my go-to. Could I build everything into the render hook? Absolutely. But I prefer having the choice - standard Markdown when simplicity is enough, explicit shortcodes when I need control. This is how shortcodes and render hooks complement each other rather than compete.
If you are wondering whether I plan to share these shortcodes and render hooks - yes, I am. More on that at the end of this post.
AI-assisted template review
Reviewing my templates with AI assistance was where my ambitions were higher than my current skill set, but also where I saw the biggest growth. I had a backlog of shortcode improvements that felt permanently stuck - edge cases I did not know how to handle, error messages that were not helpful, inconsistencies I could see but could not fix. I knew what I wanted, but I did not have the Go templating knowledge to get there.
Reviewing all custom shortcodes and render hooks with AI support changed that. I used AI as a review partner, not as an autopilot - defining guardrails in copilot-instructions.md, reviewing output critically, and iterating in smaller chunks. I would describe what I wanted a shortcode to do and get a starting point. From there, I would modify, test, break, fix, and refine until it worked exactly as I needed. The result is code I fully understand, but reached faster.
This process directly influenced my mindset and eventually inspired Exploring vibe coding as a superpower.
The review covered:
- Validating parameter handling and fallback logic
- Normalizing naming and usage examples
- Improving error handling to fail builds on invalid input
- Removing dead code and old TODO markers
The backlog that previously felt blocked is now closed, and I have a cleaner baseline to keep evolving from. More importantly, I learned patterns I can apply to future work.
Beyond posts - new pages and site features
The blog has grown beyond just posts. Over the past year, I added new pages, built helper functions, and expanded what the site communicates about itself.
AI transparency
One of the pages I am most intentional about is the AI transparency page. As AI became a bigger part of my workflow - both for building the site and writing content - I felt the need to be explicit about how I use it. The page explains where AI fits in, what stays human, and what my commitment to the reader looks like. Topic selection, viewpoints, recommendations, and writing voice remain entirely mine. AI augments the process, but it does not replace judgment.
Creating this page was not a technical challenge. It was a trust decision. Readers deserve to know how content is produced, and I would rather be transparent than leave it ambiguous. The ai-note and alert-ai shortcodes came out of this work - reusable components for flagging AI involvement where it matters.
While building the transparency page, I explored whether AI detection tools could reliably identify AI-generated content. Tools like ZeroGPT, SciSpace, and Scribbr exist, but none are definitive. They provide probability scores, not verdicts. Modern language models produce text that is increasingly difficult to distinguish from human writing. Ironically, well-structured technical documentation and SEO-optimized blog posts often trigger false positives because they share the same statistical signals that detectors look for - low perplexity and uniform sentence rhythm.
Manual checks still outperform automated detection. Voice consistency, revision history, presence of personal anecdotes, and factual grounding are stronger indicators than any classifier score. This reinforced my decision to be transparent about AI usage upfront rather than relying on tools that cannot reliably tell the difference.
Timeline
The timeline page was born out of a practical need: I wanted a single view of everything I have published, including drafts and future-dated posts that are not yet visible on the main site. It uses the calendar and lastmod shortcodes to render a chronological overview and highlight recently edited posts.
During development builds, this page doubles as a content dashboard - I can see at a glance what is scheduled, what needs attention, and what has been recently updated. It is one of those features that sounds trivial but saves real time when managing a growing content library.
Helper functions
Behind the scenes, I built reusable partial functions to reduce duplication across templates. The get-page-images function resolves images for OpenGraph and Twitter card meta tags by checking frontmatter first, then falling back to resource matching patterns, and finally to site-level defaults. It replaced scattered image logic across multiple templates with a single, testable function.
These helper functions are small individually, but they represent a shift in how I approach Hugo development - thinking in reusable components rather than one-off template code.
Noscript warning banner
The noscript warning banner addresses a simple reality: not every visitor has JavaScript enabled. Rather than letting the site silently degrade, I added a configurable warning to my header template that only appears when JavaScript is disabled:
{{ if .Site.Params.format.ScriptWarning.show | default true }}
<noscript>
    <div class='bg-warning text-center text-dark py-2 small'>
        {{ .Site.Params.format.ScriptWarning.message | default "This website requires JavaScript to function properly. Please enable JavaScript in your browser settings." }}
    </div>
</noscript>
{{ end }}
Noscript warning banner in header.html
The message is configurable via config.yml with a sensible default, and the entire banner can be toggled off if needed. It is a small addition, but it ensures visitors without JavaScript know why certain features might not work - rather than leaving them guessing.
Content workflow improvements
The technical improvements in this series get most of the attention, but the hardest changes have been personal. Moving from third person to first person across my blog and social profiles was a bigger step than I expected. Sharing technical knowledge feels natural. Sharing myself is harder.
For years, I hid behind phrases like “one might consider” and “it is recommended to” instead of simply saying “I do this because.” Changing that required accepting that my opinions and experiences have value, even when I am still learning. That shift has made both my blog posts and my LinkedIn companion posts stronger, more consistent, and more honest.
Hidden posts for external review
Hidden posts solve a specific need in my workflow: getting feedback from trusted peers before publishing. Using the build: list: never parameter in front matter, I can mark posts as hidden from all public listings while still being accessible via direct URL.
build:
  list: never
Front matter for hidden draft post
To track hidden posts, I implemented a build-time check in index.html that emits warnings during development builds:
{{- if hugo.IsDevelopment -}}
    {{- partial "funcs/check-build-list.html" . -}}
{{- end -}}
Build-time checks for drafts and hidden posts
WARN  Found 2 post(s) with 'build: list: never' (hidden from listings):
WARN  - posts/exploring-code-signing-for-microsoft-intune/index.md
WARN  - posts/exploring-windows-backup-for-organizations/index.md
Sample build-time warnings for hidden posts
Front Matter CMS
One tool that has quietly become essential to how I manage this blog is Front Matter CMS - a Visual Studio Code extension built specifically for managing content in static site generators like Hugo. It provides a content dashboard, snippet management, media handling, and structured metadata editing directly inside the editor. No browser-based CMS, no context switching - everything stays in Visual Studio Code where the rest of the work happens.
What makes Front Matter CMS stand out is how well it understands the content model. It knows about frontmatter fields, taxonomies, content folders, and page bundles. The dashboard gives me a filtered, sortable overview of all my posts - something my timeline page does during builds, but Front Matter CMS does it live, inside the editor. Snippets let me insert shortcodes without remembering the exact syntax every time. Media management handles image insertion with proper paths. These are small conveniences individually, but together they remove enough friction that I write more consistently.
Image viewer
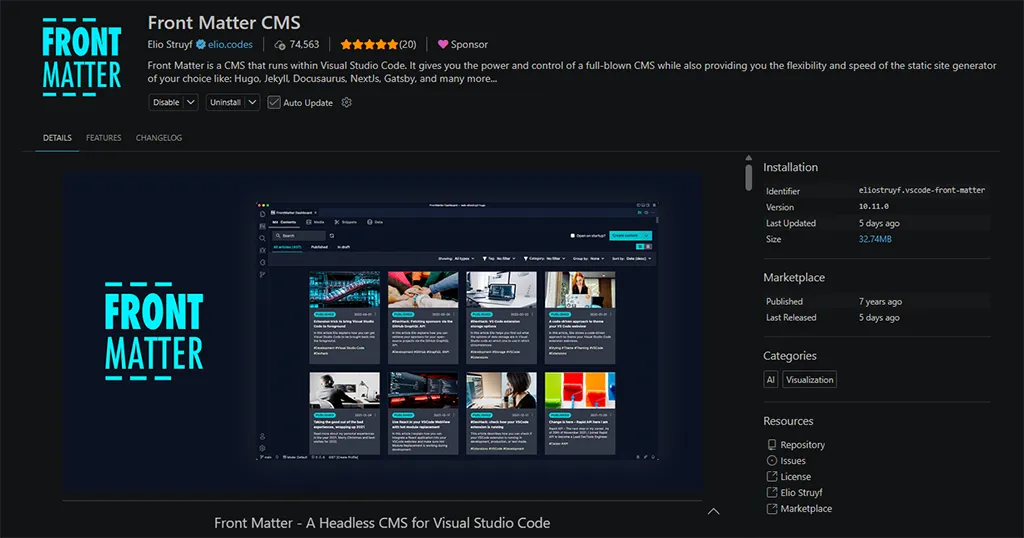
As my dependency on Front Matter CMS grew, I started noticing things I wanted to improve. That led me to contribute back - not just with feedback, but with structured issues that could actually move the project forward.
The first was a bug I hit repeatedly: when inserting images from a page bundle’s local img/ subfolder, Front Matter CMS prefixed the path with a leading slash (/img/image.webp instead of img/image.webp). In Hugo page bundles, images are resolved relative to the content file, so the leading slash caused images to point to the site root instead of the bundle folder. I filed issue #1041 with reproduction steps, and the maintainer had a fix deployed to the beta channel within days.
The second was a feature I had been wanting for a while: the ability to configure the default view state of the Contents dashboard - filters, sorting, and grouping - so it opens in the right context immediately. My repository has two content folders, and I work almost exclusively with posts sorted by date and grouped by year. Selecting the same options every time I opened the dashboard was a small thing, but it added up. I proposed the idea in issue #1036 with a detailed design suggestion, and the maintainer not only accepted it but refined the setting namespace to fit the existing configuration structure. The result is frontMatter.dashboard.content.defaults - a single setting that defines how the dashboard opens.
Both contributions shipped in Front Matter CMS version 10.11.0. The turnaround from issue to release was remarkably fast - and that speed is a direct reflection of the person behind the project. Elio Struyf builds and maintains Front Matter CMS with a level of care and responsiveness that is rare in open-source projects. He reviewed the bug report, shipped a fix to the beta channel within days, and turned a feature proposal into a production-ready setting in the same release cycle. That kind of engagement turns users into contributors and contributors into advocates. If you use a static site generator and have not tried Front Matter CMS, I strongly recommend giving it a look.
What stood out about this experience was how natural it felt. When you use a tool daily and notice something that could be better, turning that observation into a concrete issue or proposal is a small step - but it closes the loop between using open-source software and shaping it. The gap between ambition and competence shows up everywhere - even in how you engage with the tools you rely on.
Optimizing post keywords for SEO
Keyword optimization is something I now treat as a repeatable workflow, not a last-minute metadata task. Categories and tags support navigation and taxonomy, while keywords should reflect the exact intent of each post and match the language readers actually search for.
My current process:
- Start with one primary intent phrase (what the post is really about)
- Add 4-8 supporting phrases covering adjacent terms
- Keep terms specific, practical, and aligned with actual section headings
- Avoid keyword stuffing and duplicates across title, description, and summary
title: A newbie's guide to the galaxy - part 4
description: Building shortcodes, shaping new pages, and finding my voice in AI content...
categories:
  - Building my blog
  - Hugo
keywords:
  - AI assisted development
  - Hugo shortcodes
  - Hugo render hooks
  - content workflow
tags:
  - Blog
  - Ramblings
Example: Intent-focused front matter keyword strategy
Choosing the right keywords is only half of it. Before publishing, I run a few checks to make sure they actually hold up:
- Intent check: Would a reader use this phrase to solve the exact problem I cover?
- Readability check: Do keywords fit naturally in headings and body text?
- Overlap check: Am I reusing the same keyword set on too many posts?
- Search snippet check: Do title + description + keywords tell one coherent story?
If a keyword does not map to a real section, sample, or walkthrough, I remove it.
A naming convention I did not plan
Something I only noticed in hindsight is that my post titles have settled into a pattern - one I never designed, but that now feels deliberate. The naming convention reflects my relationship to each topic, and looking at the archive, the categories are surprisingly consistent.
“5 reasons…” and “5 thoughts…” posts are opinion-driven. They advocate for a mindset, a tool, or a practice. They are short, direct, and meant to spark curiosity or challenge assumptions. These were some of my earliest posts and remain the most shareable.
“How to…” posts are instructional. They solve a specific problem with concrete steps. The reader arrives with a question and leaves with an answer. These require the least personal voice - the value is in the accuracy and clarity of the instructions.
“Exploring…” posts are where I dive into territory I know about but have not deeply implemented yet. Topics like Exploring code signing for Microsoft Intune, Exploring Microsoft Copilot Cowork, or Exploring vibe coding as a superpower - I understand the territory, I want to go deeper, and I bring the reader along as I figure things out. The tone is curious and honest about what I do not know yet.
“Learning to…” posts are more personal. They are about skills I am actively developing - not technical skills, but professional and personal ones. Learning to build a LinkedIn posting strategy and Learning to focus in a world of distractions are not instructional guides. They are reflections on the process of getting better at something while being transparent about the struggle.
“Mastering…” posts signal confidence. These cover topics where I have enough depth and experience to write with authority. Mastering Windows Autopilot device preparation is not an introduction - it is a deep dive written from real-world deployments. These posts are an extension of the “How to…” format, but with more context, more nuance, and more opinions about what works and what does not.
“Building…” sits somewhere between exploring and mastering. Building instruction files for GitHub Copilot was neither pure exploration nor confident mastery - it was the active process of constructing something while learning how it works.
What I find interesting is how these categories map to the blog’s recurring theme. “Exploring” is where ambition exceeds competence. “Learning” is the struggle in between. “Mastering” is what happens when the gap finally closes - at least for that topic. The naming convention was never planned, but it turned out to be an honest signal of where I stand on each subject.
Finding my voice in AI content
The most unexpected evolution since part 3.5 has been how deeply AI-related content has become part of this blog. What started as using GitHub Copilot to review my Hugo templates grew into a genuine passion for understanding, configuring, and writing about AI-assisted workflows.
It started with Building instruction files for GitHub Copilot. That post reflected the “gap between ambition and competence” theme of this series perfectly: I wanted GitHub Copilot to understand my conventions, my terminology, my writing style. Getting there required understanding how instruction files work, what makes them effective, and how to structure them for a project with this many moving parts. What began as a single copilot-instructions.md file evolved into a modular system of topic-specific instruction files covering everything from writing style to PowerShell conventions.
From there, the exploration expanded into Microsoft Copilot Cowork and its skill system. The connection between GitHub Copilot instruction files and Microsoft Copilot Cowork skills felt natural - both are about teaching an AI assistant to work within your specific context. Exploring Microsoft Copilot Cowork skills became a bridge between the developer-focused GitHub Copilot world and the Microsoft 365 productivity world. Controlling and shaping AI behavior has become another passion of mine, and the more I explore, the more I realize how much there is still to learn.
Exploring vibe coding as a superpower tied it all together. That post was not about AI replacing skills - it was about AI accelerating learning. The same mindset that drives this series - start with ambition, struggle through the gaps, come out the other side stronger - applies directly to how I approach AI-assisted development.
LinkedIn and the rhythm of sharing
Learning to build a LinkedIn posting strategy marked another personal milestone. For years, I treated LinkedIn as a place to share links to my blog posts and little else. Building a deliberate posting strategy - with companion posts, standalone reflections, and consistent engagement - was uncomfortable at first. It felt like self-promotion, which does not come naturally.
However, the result has been stronger connections with my community and more visibility for the content I care about. The combination of blogging more frequently and sharing on LinkedIn has created a feedback loop. Writing a post generates ideas for LinkedIn companions. LinkedIn engagement generates ideas for future posts. The backlog is shrinking not because I am writing less, but because I am writing faster and with more confidence.
Development environment
A good development environment removes friction from daily work. Over time, I have built up a set of Visual Studio Code tasks, conventions, and checks that make working on this blog faster and less error-prone. Most of these came from solving specific problems: broken builds after Hugo upgrades, messy diffs from inconsistent line endings, and template code that was hard to read because of quote escaping.
Managing multiple Hugo versions
As Hugo evolves rapidly with new features and occasional breaking changes, I found myself needing to test my site against different Hugo versions. Perhaps a new release introduces a deprecation warning, or I want to experiment with a cutting-edge feature without affecting my production build. In my case, the need was more concrete: my production deployment was stuck on Hugo 0.148.2 due to limitations in Azure Static Web Apps’ build system, and I needed to develop locally against that version while also testing newer releases. How I eventually solved the deployment side comes later in this post.
Visual Studio Code tasks solve this. Instead of switching to a terminal and typing commands manually, I define tasks in .vscode/tasks.json and execute them with a few keystrokes. By combining input variables with task definitions, I created an interactive version picker that prompts me to select a Hugo version before running a command.
Why multiple versions?
There are several scenarios where running multiple Hugo versions locally proves useful:
| Scenario | Description |
|---|---|
| Testing upgrades | Before upgrading to a new Hugo release, test your site to catch deprecation warnings or breaking changes |
| Reproducing issues | When troubleshooting, you may need to verify if a bug exists in a specific version |
| Feature exploration | Try new Hugo features in isolation without committing to an upgrade |
| CI/CD parity | Match the exact Hugo version used in your deployment pipeline |
Setting up the version picker
Setting up the version picker starts in .vscode/tasks.json. By combining Visual Studio Code’s input variables with task definitions, you can create an interactive picker that prompts you to select a Hugo version before running a command.
Here is an example configuration:
{
  "version": "2.0.0",
  "inputs": [
    {
      "id": "hugoVersion",
      "type": "pickString",
      "description": "Select Hugo version",
      "options": [
        { "label": "Default (PATH)", "value": "hugo" },
        { "label": "Hugo v0.154.2 (latest)", "value": "C:\\Hugo\\hugo-0.154.2\\hugo.exe" },
        { "label": "Hugo v0.148.2", "value": "C:\\Hugo\\hugo-0.148.2\\hugo.exe" },
        { "label": "Hugo v0.139.0", "value": "C:\\Hugo\\hugo-0.139.0\\hugo.exe" }
      ],
      "default": "hugo"
    }
  ],
  "tasks": [
    {
      "label": "Hugo: Server (select version)",
      "type": "shell",
      "command": "${input:hugoVersion}",
      "args": ["server", "-D", "--navigateToChanged"],
      "isBackground": true
    }
  ]
}
Visual Studio Code tasks.json with Hugo version picker
The ${input:hugoVersion} placeholder triggers the picker dialog, letting you choose which Hugo binary to execute. To try it, press Ctrl+Shift+P, run Tasks: Run Task, choose Hugo: Server (select version), and pick your desired version from the dropdown.
Organizing Hugo binaries
To make this work, download Hugo releases from GitHub and organize them in a dedicated folder:
📂 C:\Hugo\
   ├── 📂 hugo-0.139.0/
   │   └── 📄 hugo.exe
   ├── 📂 hugo-0.148.2/
   │   └── 📄 hugo.exe
   └── 📂 hugo-0.154.2/
     └── 📄 hugo.exe
Organizing Hugo binaries for version management
Update the paths in your tasks.json to match your folder structure. You can add as many versions as needed - just extend the options array.
Practical tips
These tips help get the most out of the version picker setup:
- No restart required: Visual Studio Code automatically detects changes to
tasks.jsonwhen you save the file. Your updated tasks are immediately available the next time you run “Tasks: Run Task”. - No
.exeextension needed: When usinghugoas the command value, Windows automatically findshugo.exein PATH. This also makes yourtasks.jsonmore portable if you share the workspace with Mac or Linux users. - Keep your default Hugo in PATH: The “Default (PATH)” option uses whatever Hugo version is globally installed, making it easy to switch between your system default and specific versions.
- Use descriptive labels: Include version numbers and notes like “(latest)” or “(LTS)” in the labels for quick identification.
- Add build tasks too: Create separate tasks for building with version selection, not just the development server.
- Team sharing: Commit
.vscode/tasks.jsonto your repository so team members benefit from the same workflow.
Understanding task properties
Beyond the basic command and arguments, Visual Studio Code tasks support several properties that control behavior and integration with the editor:
| Property | Description |
|---|---|
problemMatcher | Parses task output to detect errors and warnings, displaying them in the Problems panel. Use predefined matchers like $tsc (TypeScript) or $eslint-stylish, or set to [] to disable parsing. Hugo has no built-in matcher, so an empty array is appropriate. |
group | Categorizes the task for quick access. Set to "build" for Ctrl+Shift+B access, or "test" for the “Run Test Task” command. You can also make it the default in its group using { "kind": "build", "isDefault": true }. |
isBackground | Indicates whether the task runs continuously without a defined end. Set to true for long-running processes like development servers; Visual Studio Code will not wait for completion. Set to false for one-time tasks like builds. |
presentation | Controls how the terminal behaves when the task runs. Options include reveal (when to show the terminal), panel (shared or dedicated terminal), and clear (whether to clear before running). |
For the Hugo development server, isBackground: true is essential since the server runs until you stop it. The problemMatcher: [] setting prevents Visual Studio Code from trying to parse Hugo’s output for errors (which would not work anyway without a custom matcher).
This setup has saved me countless hours when debugging version-specific issues or preparing for Hugo upgrades. It is a good example of how skills from other areas transfer - my experience with configuration management in Microsoft Intune helped me think about this as a version control problem, not a Hugo problem.
From local to deployment - upgrading Hugo in production
Managing multiple Hugo versions locally was only half the challenge. The bigger breakthrough - and honestly, the achievement I am most proud of in this entire chapter - was upgrading the Hugo version used in my production deployment pipeline.
For months, my Azure Static Web Apps deployment was stuck on an older Hugo version. The Docker container used by Azure’s build system relied on an outdated framework, and every attempt to upgrade resulted in the same unhelpful error message. No clear cause, no obvious fix. I understood my setup conceptually, but I could not find the answer in documentation or forums. I wanted to upgrade because staying current matters - newer versions bring performance improvements, security fixes, and features I wanted to explore.
Eventually, I turned to GitHub Copilot - not to generate code blindly, but to help me close the gap between ambition and skill. It coached me through the problem step by step, helping me find a way around the built-in components in the GitHub Actions workflow file. It took a few rounds of trial and error, but each iteration got me closer to understanding what was actually going wrong. That is the use case I keep coming back to: AI did not replace my thinking - it matched my ambition to the skill I needed in that moment.
The workaround was to bypass Azure’s built-in Oryx build system entirely. Instead of letting Azure build the site with its outdated Hugo version, I use Hugo’s official Docker image to build externally and then deploy only the pre-built output:
env:
  HUGO_VERSION: v0.161.1

steps:
  # Build Hugo with explicit version (Docker)
  - name: Build Hugo site (Docker)
    run: |
      docker run --rm \
        -v ${{ github.workspace }}:/src \
        -w /src \
        ghcr.io/gohugoio/hugo:${{ env.HUGO_VERSION }} \
        --minify

  # Deploy ONLY (no build in Azure)
  - name: Deploy
    uses: Azure/static-web-apps-deploy@v1
    with:
      action: "upload"
      app_location: "public"
      skip_app_build: true
GitHub Actions workflow - building Hugo externally and deploying to Azure Static Web Apps
The key is skip_app_build: true combined with pointing app_location to the already-built public folder. Azure just serves the files without trying to build anything. The Hugo version is now a single environment variable at the top of the workflow - upgrading is a one-line change.
Seeing the build pass with the latest Hugo version after months of being stuck was one of the most satisfying milestones in this entire journey. I was excited enough to share it on LinkedIn , which says something about how frustrating the problem had been. Being able to run the latest Hugo version in production means I can pick up months of improvements. More importantly, my local development environment and production pipeline are finally in sync. No more “works locally but breaks in deployment” surprises.
Quoting conventions
One seemingly trivial decision that consumed more time than I expected was choosing between single quotes (') and double quotes (") in my templates. I spent an embarrassing amount of time researching this, reading countless opinions online, only to realize that consistency matters more than which style you choose.
My rule: Single quotes for HTML attributes, double quotes for Hugo/Go template code.
- Hugo parameters require double quotes:
{{ partial "header.html" . }}works, but single quotes cause a syntax error - HTML attributes work with either: Both
class="container"andclass='container'are valid HTML5 - Nesting becomes cleaner:
<div class='{{ .Params.customClass | default "default-class" }}'>avoids escaping
Here is an example from one of my shortcodes:
<figure class='figure {{ with .Get "align" }}text-{{ . }}{{ end }}'>
  <img src='{{ .Get "src" }}' alt='{{ .Get "alt" | default (.Get "title") }}' class='figure-img img-fluid'>
  {{ with .Get "caption" }}
  <figcaption class='figure-caption'>{{ . }}</figcaption>
  {{ end }}
</figure>
Example of quoting conventions in Hugo templates
For Hugo development, single quotes for HTML and double quotes for Go templates reduces friction and keeps nesting readable.
Line endings
Another rabbit hole I discovered was line endings - the invisible CR/LF differences that cause messy diffs and unexpected build behavior. The practical lesson: decide early, standardize hard, and automate checks. I now use UTF-8 and LF consistently in this repo to keep diffs clean and collaboration predictable.
Instead of duplicating the full deep dive here, I cover the technical implementation in detail in How to validate and improve your PowerShell scripts - File encoding and line endings.
Site optimization checklist
For every new entry in this series, I run the same optimization checkpoint. These are not one-time tasks - they are ongoing responsibilities:
- Run performance checks in PageSpeed Insights and Pingdom Website Speed Test
- Validate HTML with W3C HTML Validator
- Validate feeds with W3C Feed Validation Service
- Validate CSS with W3C CSS Validation Service
- Confirm cache and security headers in
staticwebapp.config.jsonand test with SecurityHeaders - Validate TLS/SSL configuration with Qualys SSL Labs SSL Server Test
- Test in browsers with JavaScript disabled and verify the noscript warning banner displays correctly
- Run cross-platform and cross-browser checks with BrowserStack or Responsively App
If you want to add validation badges to your own site, W3C provides official validation icons you can display after passing their checks - Treat badges as evidence of process - not decoration.
Looking ahead
This series is still intentionally practical and honest. It is not a perfect guide - it is a living build log of what worked, what failed, and what I fixed.
Every section in this post represents something I did not know how to do when I started. The shortcodes and render hooks - the new pages - the AI content journey - the Visual Studio Code tasks. All of it started with confusion and ended with understanding. That pattern has not changed since part 1, and I suspect it never will.
The pipeline ahead is full. I have been working on a Windows 365 series that I hope to start publishing after the summer holidays - multiple posts covering deployment, configuration, and operational lessons from real-world environments. Windows 11 26H2 is on the horizon, and with new Microsoft Surface devices expected alongside it, I anticipate more posts exploring those topics as well. The AI and Copilot content will keep growing too - there is still so much to explore around GitHub Copilot, instruction files, and Microsoft Copilot Cowork.
I am also working on releasing my custom shortcodes, render hooks, partials, and functions as open-source projects on GitHub. The plan is to package them in a way that makes them easy to adopt - with documentation, usage examples, and configuration options. I will announce when they are ready.
The ambition keeps growing, the competence keeps chasing it, and the blog keeps getting better in the process. More is likely to surface as I ramble along.
–Jesper
Header image attribution: Image created with help from Adobe Firefly