How do you ensure a reset device returns to your organization instead of becoming a personal device?
In enterprise environments, maintaining control over devices throughout their lifecycle is a critical concern. The TenantLockdown Configuration Service Provider (CSP) addresses this challenge by forcing Windows devices to connect to a network during OOBE (Out-of-Box Experience) after a reset - preventing users from skipping network connectivity.
What is Tenant Lockdown?
Tenant Lockdown is a feature (powered by the TenantLockdown Configuration Service Provider) that forces devices to connect to a network during the Out-of-Box Experience (OOBE) after a reset. By requiring network connectivity, it ensures devices cannot skip the network step during OOBE - but it does not by itself prevent users from selecting “Setup for personal use” or creating local accounts. For full protection, TenantLockdown should be combined with Windows Autopilot device registration.
The name “Tenant Lockdown” is somewhat misleading - it suggests the feature locks a device to a specific tenant, but in reality it only ensures network connectivity during OOBE. A more accurate name might be “RequireNetworkInOOBE” (which is actually the name of the underlying setting). The tenant binding only happens when combined with Windows Autopilot device registration.
Image viewer
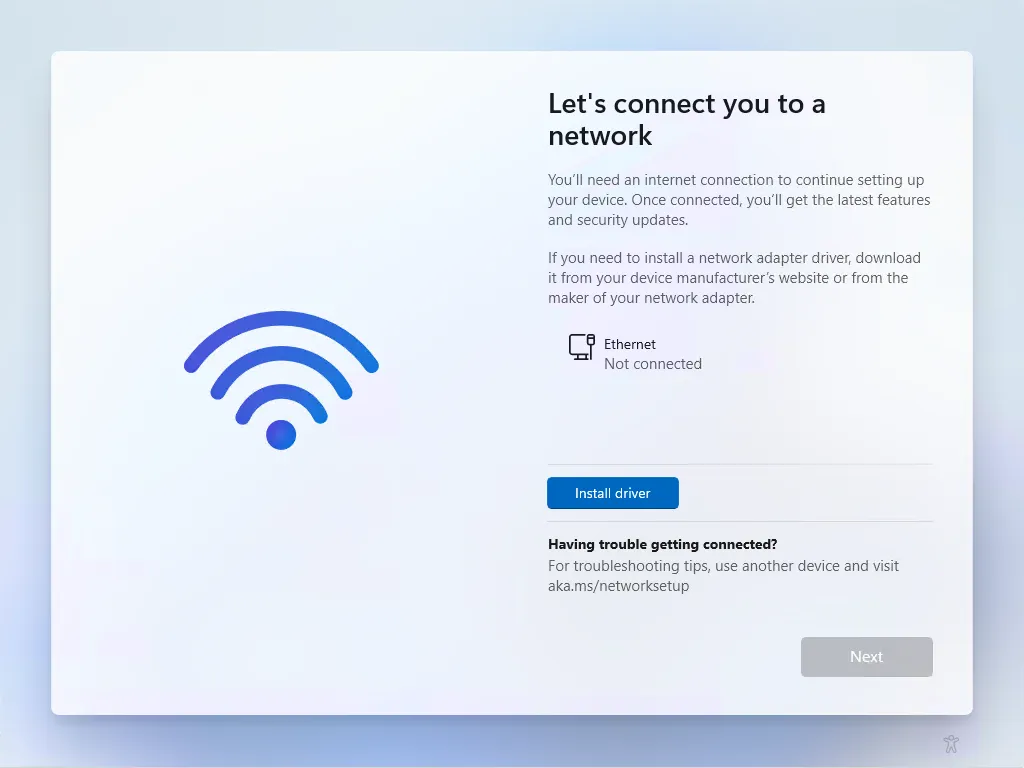
Key characteristics of Tenant Lockdown:
- Network enforcement: Requires devices to connect to a network during OOBE before proceeding - removes the “Skip for now” option for network.
- Reset protection: Prevents devices from completing OOBE offline after a reset.
- Requires Windows Autopilot for full protection: TenantLockdown alone does not hide “Setup for personal use” or bind the device to your tenant. Combine with Windows Autopilot device registration for complete protection.
- Limited theft deterrent: Reduces the value of stolen devices when combined with Windows Autopilot, but can be bypassed by reinstalling Windows from external media. See Complementary protections for ways to address this limitation.
Important
The forced network connection requirement is only applicable to devices after a reset - not to brand new devices experiencing their first OOBE, nor to devices that have been reinstalled using external media (bare metal recovery scenarios).Note
While Tenant Lockdown works with both Windows Autopilot and Windows Autopilot device preparation, the benefits are limited with Windows Autopilot device preparation. Since Windows Autopilot device preparation does not register the hardware hash with Microsoft, there is no device registration to enforce tenant binding after the network connection is established. The policy will ensure OOBE waits for network connectivity, but users could still select “Setup for personal use” on devices using Windows Autopilot device preparation. For general policy deployment, it is fine to assign this policy to devices using either Windows Autopilot type.Why Tenant Lockdown matters
Without Tenant Lockdown, a user who resets a managed device could skip the network connection during OOBE entirely and complete device setup offline - no enrollment, no policies, no organizational control. I have seen this happen in practice: a user resets a managed laptop, skips the network step, creates a local account, and the device effectively disappears from management. If the device is also registered with Windows Autopilot, combining it with TenantLockdown closes this gap - the device connects to the network, recognizes the Windows Autopilot registration, and re-enrolls automatically.
Understanding RequireNetworkInOOBE
The TenantLockdown CSP has a single but powerful setting: RequireNetworkInOOBE.
./Vendor/MSFT/TenantLockdown/RequireNetworkInOOBESetting details
| Property | Value |
|---|---|
| Node path | ./Vendor/MSFT/TenantLockdown/RequireNetworkInOOBE |
| Value type | Boolean |
| Supported operations | Get, Replace |
| True | Require network connection in OOBE |
| False | No network connection requirement in OOBE |
When RequireNetworkInOOBE is set to True:
- Users must connect to a network during OOBE before proceeding
- There is no “Skip for now” option for network connectivity
Supported Windows Editions
Tenant Lockdown is available on the following Windows editions:
| Edition | Windows 10 | Windows 11 |
|---|---|---|
| Home | No | No |
| Pro | Yes | Yes |
| Windows SE | No | Yes |
| Business | Yes | Yes |
| Enterprise | Yes | Yes |
| Education | Yes | Yes |
Configuring Tenant Lockdown in Microsoft Intune
There are multiple ways to configure Tenant Lockdown in Microsoft Intune:
Option 1: Using Settings Catalog
- Sign in to the Microsoft Intune admin center .
- Navigate to Devices > Configuration profiles > Create profile.
- Select Windows 10 and later as the platform.
- Choose Settings catalog as the profile type.
- Select Create.
- Enter a descriptive name for the profile (e.g., “Windows - Tenant Lockdown Policy”).
- Select Next and then Add settings.
- Search for Tenant Lockdown in the settings picker.
- Select the Tenant Lockdown category and add:
- Require Network In OOBE: Set to True
- Select Next and assign the profile to the appropriate device groups.
- Review and create the profile.
Option 2: Using Custom OMA-URI Profile
- Sign in to the Microsoft Intune admin center .
- Navigate to Devices > Configuration profiles > Create profile.
- Select Windows 10 and later as the platform.
- Choose Templates > Custom as the profile type.
- Select Create.
- Enter a descriptive name (e.g., “Windows - Tenant Lockdown OMA-URI”).
- Select Next and then Add to create a new OMA-URI setting.
- Configure the following:
- Name: Require Network In OOBE
- Description: Requires network connectivity during OOBE after device reset
- OMA-URI:
./Vendor/MSFT/TenantLockdown/RequireNetworkInOOBE - Data type: Boolean
- Value: True
- Select Save, then Next.
- Assign the profile to appropriate device groups.
- Review and create the profile.
Note
It is recommended to deploy Tenant Lockdown to all managed Windows devices to ensure consistent protection across your device fleet.Benefits of Tenant Lockdown
The value of Tenant Lockdown depends on whether you combine it with Windows Autopilot device registration. On its own, TenantLockdown enforces network connectivity during OOBE - useful, but limited. When paired with Windows Autopilot, the benefits multiply significantly:
- Automated re-enrollment: Devices that connect to the network during OOBE are recognized by the Windows Autopilot service and re-enroll with your organization automatically - no manual intervention required.
- Simplified device recovery: Returned or recovered devices reconnect to your tenant without IT involvement.
- Theft deterrent: The combination of forced network connectivity and Windows Autopilot registration makes stolen devices difficult to repurpose, reducing their value.
- Audit trail maintenance: Devices remain tracked within your management infrastructure, supporting compliance and governance requirements.
- Data protection: Prevents unauthorized access to potentially cached sensitive data by ensuring devices re-enroll and receive policies.
Note
TenantLockdown alone does not prevent users from selecting “Setup for personal use” or creating local accounts. The tenant binding and enrollment enforcement only happen when Windows Autopilot device registration is in place.Limitations of Tenant Lockdown
It’s important to understand that Tenant Lockdown is a software-based protection, not a hardware-backed solution like Apple’s Activation Lock. This means there are scenarios where the protection can be bypassed.
Physical devices vs. virtual devices
Tenant Lockdown is designed for physical devices and may not be applicable or beneficial for virtual environments:
| Device type | TenantLockdown applicable | Recommendation |
|---|---|---|
| Physical devices | Yes | Deploy to all managed physical devices |
| Windows 365 Cloud PCs | No - redundant | Exclude from policy; Cloud PCs are inherently tenant-bound |
| Azure Virtual Desktop | No - redundant | Exclude from policy; session hosts are managed differently |
| Hyper-V/VMware test VMs | Technically yes | Consider excluding test/lab VMs for flexibility |
Note
When assigning Tenant Lockdown policies, consider creating device groups that exclude virtual devices. Windows 365 Cloud PCs and Azure Virtual Desktop session hosts are already bound to your organization through their respective services, making TenantLockdown redundant and potentially problematic for reprovisioning scenarios.Software-based protection limitations
RequireNetworkInOOBE is stored in the MDM policy store, which lives inside the Windows installation itself. Think of it as “a setting stored inside Windows, not on the device.” When Windows is removed, the setting is removed with it. There is no firmware-level persistence for this setting.
| Scenario | TenantLockdown persists | Reason |
|---|---|---|
| Windows Reset (Keep my files) | Yes | MDM policy store preserved |
| Windows Reset (Remove everything) | Yes | MDM policy store preserved |
| Fresh Start | Yes | MDM policy store preserved |
| Windows Autopilot Reset | Yes | MDM policy store preserved |
| Cloud Reset | Yes | Unless “Clean the drive” is selected |
| Fresh Windows install from USB/ISO | No | Entire MDM database erased |
| Diskpart clean + install | No | All partitions removed |
| Re-imaging | No | Custom image replaces OS |
| Recovery media reinstallation | No | Clean OS installation |
Why TenantLockdown still provides value
Despite these limitations, TenantLockdown remains valuable because:
- Technical barrier: Most users lack the knowledge or tools to perform a clean Windows installation from external media.
- Data loss: A fresh installation completely wipes all data, which may deter some attackers.
- Deterrent effect: The effort required reduces the attractiveness of stealing devices.
- Casual bypass prevention: Prevents the most common bypass attempts (simple resets).
Complementary protections
For TenantLockdown to provide meaningful protection against determined attackers, you must combine it with firmware-level controls that prevent booting from external media:
- UEFI/BIOS password: Prevents changing boot order or booting from external media without authorization. This is essential - without it, TenantLockdown can be trivially bypassed.
- Disable external boot devices: Configure UEFI to prevent booting from USB, DVD, or network sources.
- Secure Boot: Helps ensure only trusted software runs during startup.
- BitLocker encryption: Protects data even if the device is stolen or reinstalled.
- Windows Autopilot device registration: Devices registered with Windows Autopilot will still be recognized by Microsoft and prompted to enroll even after a fresh install. The hardware hash is stored in the Windows Autopilot service, providing a hardware-level binding that persists across OS reinstalls.
Drawbacks and considerations
Tenant Lockdown is straightforward to deploy, but there are practical considerations to plan for:
| Consideration | What it means |
|---|---|
| Network dependency | Users must have network access during OOBE; devices cannot be set up offline. Ensure reliable connectivity, especially for remote or field locations. |
| No local account fallback | If network issues occur during OOBE, users cannot proceed with setup at all. |
| Device repurposing | Devices cannot be easily repurposed for personal use or resale without explicitly releasing the TenantLockdown setting first. See How to release a device. |
| No offline provisioning | Devices with TenantLockdown cannot be provisioned using methods that skip network connectivity, unless using bare metal recovery media. |
Tip
When disposing of or reselling a device, disable RequireNetworkInOOBE before resetting it. While the setting does not bind the device to your tenant, leaving it enabled forces the new owner to connect to a network during OOBE - which is unnecessary and potentially confusing for someone setting up a personal device.How to release a device from Tenant Lockdown
There are situations where you need to release a device from TenantLockdown, such as device disposal, resale, or tenant migration. Here’s how to do it:
Method 1: Disable RequireNetworkInOOBE via policy
Before resetting or retiring a device, disable the TenantLockdown setting:
- In the Microsoft Intune admin center , navigate to your TenantLockdown configuration profile.
- Edit the profile and set Require Network In OOBE to False.
- Deploy the updated policy to the target devices.
- Wait for the policy to sync to the device.
- The device can now be reset without enforcing network connection during OOBE.
Method 2: Using Custom OMA-URI
To disable TenantLockdown via OMA-URI:
- Create or modify a custom configuration profile.
- Configure the following OMA-URI setting:
- OMA-URI:
./Vendor/MSFT/TenantLockdown/RequireNetworkInOOBE - Data type: Boolean
- Value: False
- OMA-URI:
- Deploy to the target devices.
- After sync, the device is released from tenant lockdown.
Method 3: Remove device from management
If the device needs to be completely released from your organization:
- In the Intune admin center, navigate to Devices > All devices.
- Select the target device.
- Select Delete to remove the device from Intune management.
- In Microsoft Entra admin center, navigate to Devices > All devices.
- Select the device and choose Delete to remove it from Microsoft Entra ID.
- Reset the device - it should now go through OOBE without tenant restrictions.
Warning
Always ensure proper authorization before releasing devices from TenantLockdown. Document the release process and maintain records for audit purposes.Troubleshooting Tenant Lockdown
If you encounter issues with Tenant Lockdown, consider these troubleshooting steps:
Verify policy deployment
Whether you configure Tenant Lockdown using the Settings Catalog or a custom OMA-URI profile, the RequireNetworkInOOBE setting is stored in the internal MDM policy database - not in a browsable registry key or file. The Settings Catalog provides a user-friendly interface, but under the hood it writes to the same MDM policy store as the TenantLockdown CSP.
To verify the TenantLockdown policy is applied:
- In the Microsoft Intune admin center , navigate to Devices > All devices.
- Select the target device and go to Device configuration.
- Verify the TenantLockdown profile shows as Succeeded.
Alternatively, on the device itself:
- Navigate to Settings > Accounts > Access work or school.
- Select the connected account and choose Info.
- Scroll down to view the applied policies and verify the TenantLockdown policy is listed.
Common issues
| Issue | Possible Cause | Resolution |
|---|---|---|
| Device not requiring network after reset | Policy not deployed | Verify profile assignment and sync status |
| User can skip network connection | RequireNetworkInOOBE set to False | Check profile configuration |
| Device locked to wrong tenant | Previous enrollment not properly cleaned | Delete device from both Intune and Microsoft Entra ID |
Final thoughts
Tenant Lockdown enforces network connectivity during OOBE after a reset, but it fits best with Windows Autopilot. Windows Autopilot registration stores your device’s hardware hash with Microsoft, which causes the device to be recognized and routed to your tenant when it connects to the network - hiding the “Setup for personal use” option entirely.
When implementing device lifecycle management, consider this layered approach:
- TenantLockdown - Forces network connectivity during OOBE
- Windows Autopilot device registration - Binds devices to your tenant via hardware hash
- UEFI/BIOS password - Prevents booting from external media
- BitLocker - Protects data at rest
Happy exploring!
–Jesper